Not optimizing images is a very/too common mistake on websites. While page load time has become a crucial factor for good search engine optimization, we regularly see images fresh out of the camera uploaded online without any processing. If you’ve ever done this… Don’t do it again !
In the tutorial below, we will see :
- How to know that my image is not suitable for the Web ?
- Which free software can I use to resize images (using the free software XnView)
- How to properly name my images?
Erratum: the advice about the image being in 72 Dpi is not correct. It’s an old myth that persists, the truth is, resolution does not impact the display on screen or the weight of the image. Only the width/height matters. Just try it at 3000 dpi and at 1 dpi to be convinced.
Resizing, then cropping an image
Sometimes the format of the images to be prepared is not standard. Here is, for example, how to prepare an image in the format 1230 * 600 from a source image of 3500 * 2234
- Set the width to 1230 px
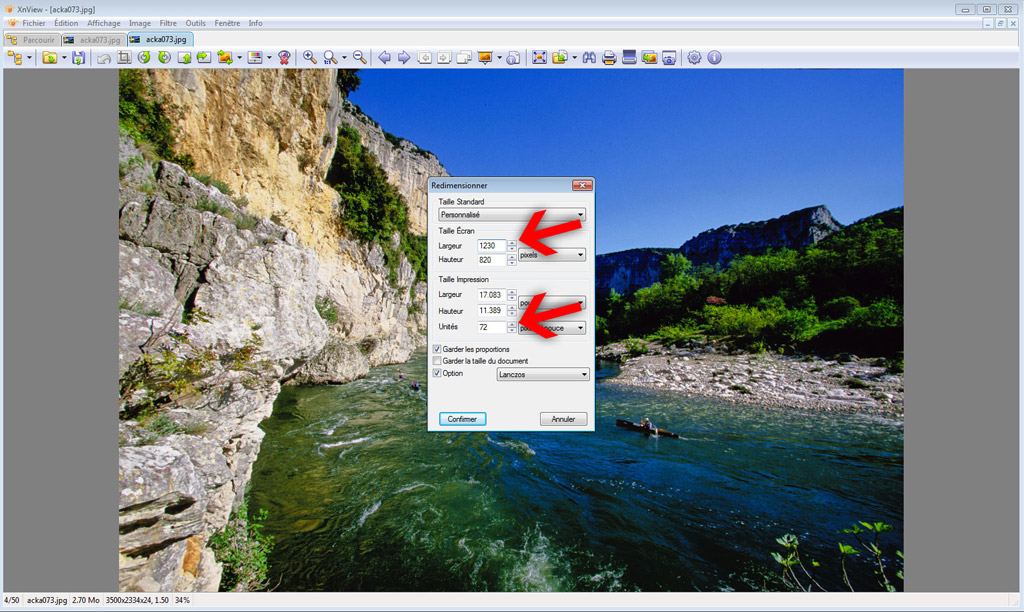
- “Crop” the image to reduce its height to 600px
Make a selection rectangle, then click on the “crop” button
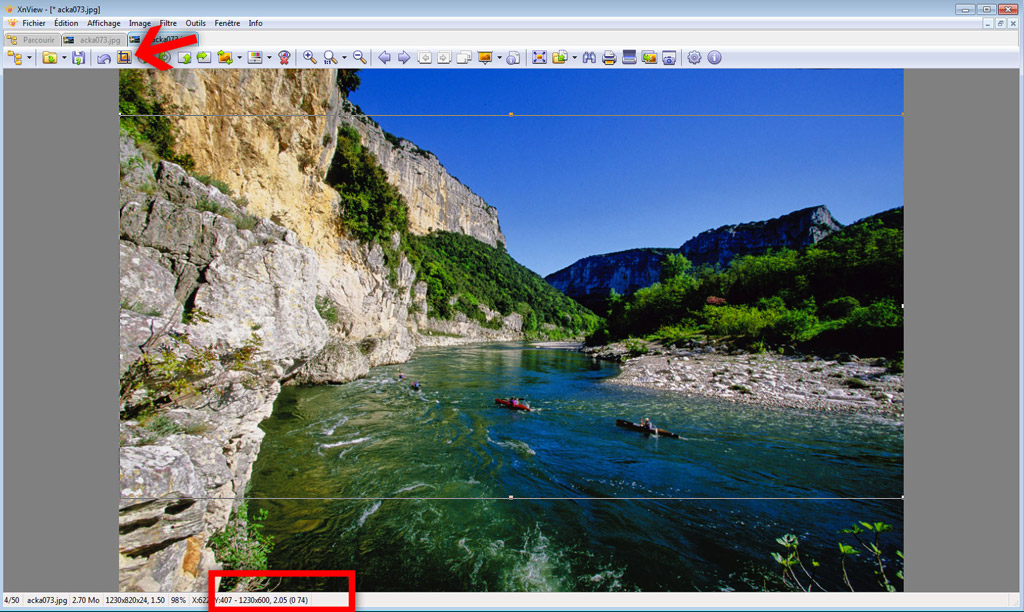
- Save the image.
Finding the size of an element
Another question we are frequently asked during training sessions :
“I understand that I need to resize my images, but how can I know the right image size to use on my website ?”
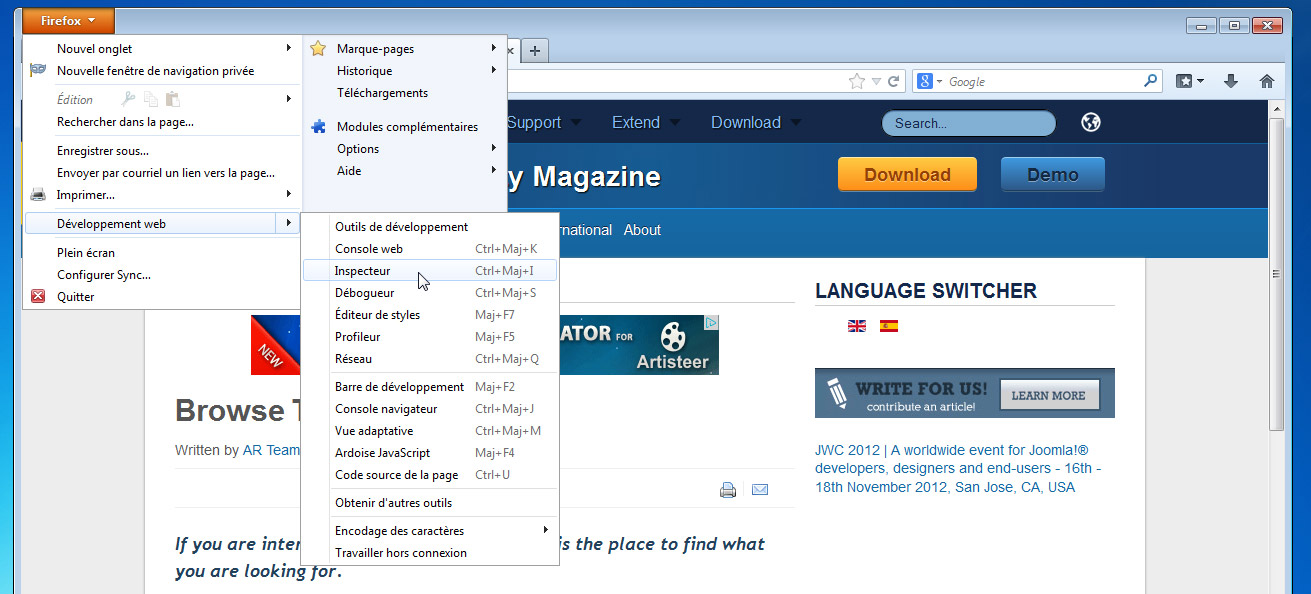
Use the Firefox Inspector

Select the area that will contain your image, area ‘4’ gives you the width of the area, hence your future image’s width.